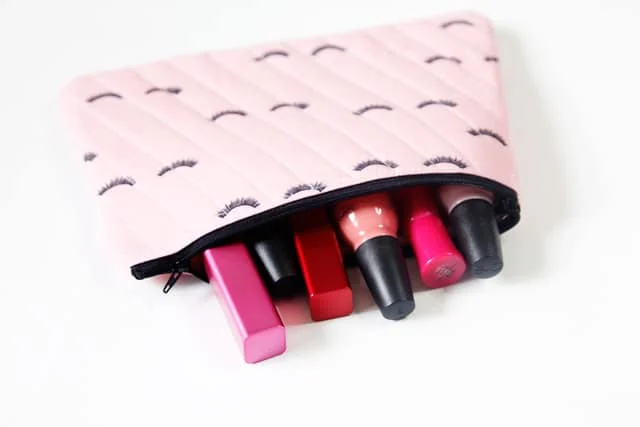
Welcome to your new crafting project! Today, we’ll be exploring an engaging tutorial on how to create a quilted cosmetic bag. This project is unique and fun to create, perfect for storing more delicate items, like glass nail polish bottles, and is also great for travel.
The quilting done with topstitching adds a charming touch to the bag and is really enjoyable to create. You can use any fabric for this, but the lashes, lipstick tubes, and lips from the Kiss Me Kate Fabric line are personal favorites for this project.
This tutorial will guide you step by step through the process, including a detailed list of materials needed and a comprehensive set of instructions.
So, whether you are a seasoned crochet enthusiast or a beginner looking for a new challenge, this tutorial is designed with you in mind.
Materials Needed
Before you begin, make sure you have the following materials on hand:
- Fat Quarters of Kiss Me Kate
- 12″ zipper
- Needle felted batting
- Fusible interfacing
- Pattern piece (you can download this from the original tutorial page).
Step-by-Step Instructions
Now that you have all your materials ready, let’s jump into the crafting process.
- Cut 2 layers each of the main fabric, lining fabric, batting, and fusible interfacing.
- Fuse the interfacing to the back of the main fabric pieces. Lay the batting on the backside of the lining pieces.
- Assemble your bag by laying the zipper face down on the main fabric. Then, put the lining face down on the zipper, pin in place, and sew.
- Turn and press. Pin the main and lining together to keep them intact. Topstitch along the top of the main fabric.
- Use a quilting pattern of your choice to quilt the layers together. For this pouch, diagonal lines about 3/4″ apart were used.
- Repeat the first few steps with the other main and other lining pieces1.
- Quilt the back of the bag.
- Open the zipper, then pin the right sides of the pouches together, matching up the corners and zipper. Sew around the pouch, pivoting at the corners.
- Finish the seam allowances with a serger or a zigzag stitch.
- Finally, turn your bag right side out, and voila, your quilted cosmetic bag is ready!
Conclusion: Perfection is a Journey
Remember, crafting is not just about the end product; it’s about the journey. Each stitch you make brings you one step closer to perfection. The more you practice, the better you become. Don’t worry about making mistakes – every great crafter has been there. So keep practicing, keep creating, and most importantly, keep enjoying the process. Your quilted cosmetic bag is a testament to your skill and patience. Wear it proudly, and let it inspire you to take on even more crafting challenges.


